How to
convert a Bachmann class 66 for radio control and slow speed running.
In BRM
magazine of November 2015, I described my early experiments with converting a
Lima class 66 for radio control, and how the motor can be controlled to make it
run slowly.
Power for the
loco is taken from the track, and speed commands are sent via a radio link to
an onboard microprocessor. The demanded speed is compared with the actual speed
of the motor, and the motor drive is varied as necessary to obtain the desired
speed.
Unfortunately,
the ringfield (pancake) motors in the Lima models are
not able to perform too well at these speeds as there are too few poles, making
them more than a little jumpy when run slowly, even with the microprocessor
doing its best to keep them going steadily.
The Bachmann
motors, on the other hand, are much better and offer the ability to do some
spectacular slow running when properly controlled. Since all 6 axels on the
Bachmann class 66 are driven, the pulling power of these models is excellent. With
speed controlled motors, long freight trains can be
driven slowly and smoothly at very realistic slow speeds and gentle acceleration
and deceleration to suit the heavy loads.
The
conversion process is fairly straightforward and I
have designed drop in PCBs for both the main control board and the head/tail
lights.
This is what
the PCB inside a class 66 looks like. There are different versions
but they all look pretty much alike. The DCC socket is centre right.
All this
gets removed and is no longer needed. Unscrewing it provides access to the centrally
mounted motor underneath.

This has two
brass fly wheels and then a drive shaft takes the rotation to a worm drive on
each bogie. The motor needs unscrewing for modifying so that its speed can be
monitored. The capacitors are removed as they are incompatible with the high speed pulsed motor drive signals which will be used.

The
modifications to the motor are simple. Just add strips of black paint at
regular intervals around one of the brass flywheels. On some I have also put
white paint in between the black strips which does make setting it up easier.
These stripes are read by an optical pickup, and are
fed to the microprocessor so that it knows exactly how fast the motor is
turning.
While the
loco is apart, then the replacement head and tail light
PCB is fitted under the driver's cab.

This makes
controlling the LEDs easier as they all share the same supply to their anodes, and turning one on is as simple as grounding the cathode
through a resistor. By modulating the light (ie
rapidly turning it on and off) it is also possible to adjust the brightness. 
Here is the
driver's end with 'day' headlights showing, one headlight being brighter than
the other.
The other
important thing needed is some stay-alive capacitors as at such slow speeds, it
is not possible to guarantee a supply through the track even with 4 axles (or even
6 on some models) having pickups. There are two of these high value super-capacitors
rated at 12VDC and they are wired in series and wrapped in black PVC tape so
that they don't come into contact with the chassis.

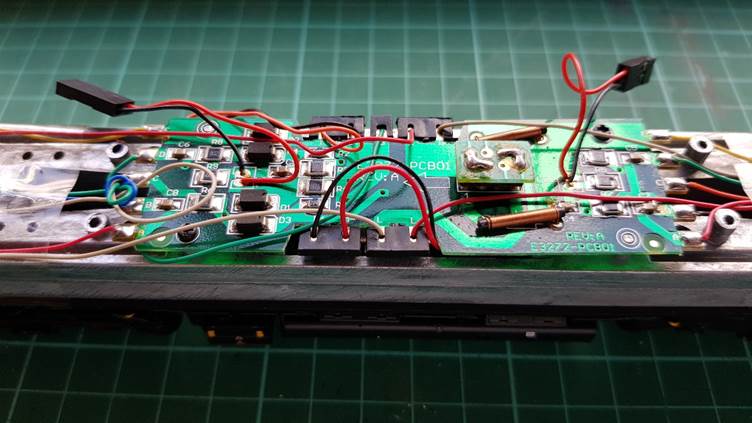
This is what
the assembled unit looks like with the marker lights in the cab soldered to the
PCB as well. The small blue module is the radio transceiver.
Once screwed
to the chassis the only thing left to do is to make sure that the light sensor
on the underside of the PCB is at the correct distance from the striped
flywheel to pick up the rotation of the motor.
For
controlling the loco, I have made this hand controller.
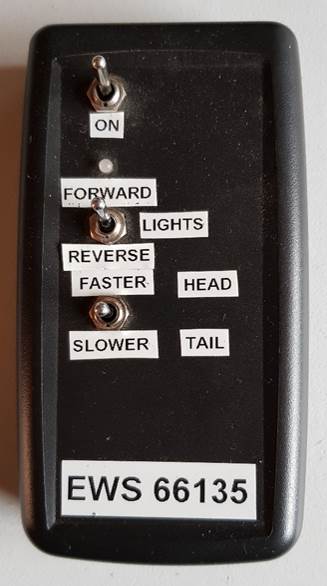
It controls
the loco's direction, speed and head/tail lights all
with two toggle switches. There is also an on-off switch.
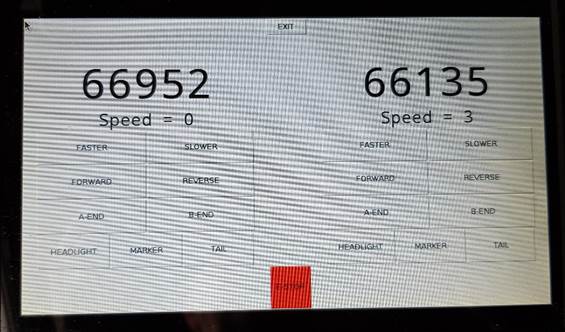
Another type
of controller is based on a Raspberry Pi with a touch screen using a
programming language called Python to control the loco, in fact this program
can control 2 at the same time using a simple touch screen.
I am now working
on linking the Raspberry Pi to track detectors, point motors and signals. This
will mean that a timetable can be developed, routes set, trains sped up and
slowed up all with extremely realistic movement.
If you want
to know more about this project, then please email me.